If you have been following along with our homestead posts, you know that we dabble at homesteading in the midst of a busy life. We enjoy being outside, learning to grow and raise our own food, teaching our children responsibility, and the taste of a garden fresh tomato!! Since my last post about gardening a couple months ago, we have added some new friends to our homestead, had a few successes and some challenges.
*Some of the links in my posts may be affiliate links see below for more information. *
New Animals
A few weeks ago we added three turkey poults to our homestead. These, along with the nine that we are getting next week as a part of a 4-H turkey show, will be raised by my oldest three children and then processed in late October or November.
Next, we added guinea keets last week. My children had been asking for guineas for awhile now and we decided it was finally time to give it a try. Guineas are different from our chickens and ducks because they are much more independent. They also need very little feed and will forage for most of their diet. They should be a benefit to our homestead by helping control the snake and tick population. During the spring they will also produce eggs, which my son hopes to incubate and be able to increase our flock as well as sell some keets.
Finally, just this week we were able to find a good companion goat for my daughter’s show goat. This goat’s original name was Amara but my daughter has named her Wilhelmina Amara. Her show goat’s name is Houdini (because he is an escape artist) and the real Houdini’s wife was named Wilhelmina. We are excited for this addition to the homestead and enjoying watching the two goats play together.
Successes and Challenges
One of the biggest challenges we are facing right now are the deer who think our garden makes for a wonderful buffet. We have a fence and first they were just eating what was up against the fence but most recently they are jumping the fence to dine on our garden. I love watching the deer grazing on the grass in the back yard, but we are working on solutions to keep them out of the garden. I have some netting ordered to see if that will help keep them out of the fence. If you have any solutions that have worked for you, I would love to hear about them.
On a happier note, the garden is starting to really yield its harvest and we are enjoying the ‘fruits of our labor’. We are currently harvesting blueberries, yellow squash, and cherry tomatoes. With-in the next week we should also be getting patty pan squash and slicing tomatoes. The potato crop is growing nicely and we have some baby eggplant and peppers that will be ready soon as well.
My children participated in a virtual chicken show this month and did really well. My son did well enough in the first round to move on to the finals and placed fourth in his age group. They very much miss their in-person events but were grateful for the chance to show virtually.
How are things going where you are? I would love to know what you are harvesting from your gardens and any tips about the deer!
Affiliate Disclosure and Resource Library
When you sign up for our free resource library you will get a link and password to the library, we are adding to the library each month with new items. You will also get a bi-weekly newsletter email to keep you up to date on what we have going on.
This post may contain affiliate or referral links, including Amazon affiliate links. As always I will never recommend a product that I don’t believe in and you will never be charged more for purchasing through our links. It does help pay for the costs associated with the blog.
Deals and Freebies
Homeschool Complete is offering a special 10% off discount to my readers! Just use code: SWAG
Evan-Moor is offering their Daily Fundamentals book FREE right now to help out during this time.
Get a FREE Literature Kit from LitWits using Code 11READ4FUN. We are currently enjoying the Heidi kit but have also previously loved the My Side of the Mountain kit.
IEW is offering some great free resources right now.
Disclaimer: I received a FREE copy of this product through the HOMESCHOOL REVIEW CREW in exchange for my honest review. I was not required to write a positive review nor was I compensated in any other way.
Normally, when I agree to review a product, I am not really sure what to expect or what I am getting, but this review was a little different. My oldest son was already working through No-Nonsense Algebra by Math Essentials and I was excited to get the newest edition for my daughter to use.
If I am being completely honest, I NEVER liked algebra. Not when I took it in eighth grade, not when I took Algebra II in high school, not when I helped tutor it later. I just never found it to be easy and I was not looking forward to teaching it in our homeschool. I would much rather sit and read aloud or do a science experiment. However, I know that algebra is an important part of my children’s education so I set out to find a curriculum that would help me through this process as painlessly as possible.
My son is very bright but struggles with the attention to detail needed for upper level math. He does not like a lot of frills and wanted a basic laid out approach. I needed something that could help teach him the concepts each day. No-Nonsense Algebra is a text book that provides written instruction and a short video tutorial (typically about 3-5 minutes) for each lesson. Then there are 12 to 18 problems for the student to complete related to that lesson and four review problems covering concepts from previous lessons. This provided enough practice and review to ensure understanding of the concepts without feeling like there was a lot of ‘busy work’. Often in math curriculums I see every practice problem similarly worked in an example. With Non-Nonsense Algebra the practice problems tended to be of increasing complexity, forcing the learner to ‘take the next step’ in solving the problem.
One issue we had with the older edition were occasional mistakes in the answer key (which is located in the back of the book). These simple mistakes were causing us a lot of problems, because I was not working out the problems and thus would not realize that it was wrong until he had tried it again several times and my husband would work it out later. However, when we received the 2nd edition, I was pleased to find out that those mistakes had been corrected. There are also some extra chapter quizzes included in the 2nd Edition to help with review and retention.
No-Nonsense Algebra did not make my son fall in love with algebra. He would have still rather letters have never been included with math. However, he did like the way it was laid out and I feel like it was an effective program for him. Many days, especially once he started following the directions and writing down the practice problems with the video lessons, he was able to work through the lessons independently and understand the concepts. Other days, my husband would sit down and help him with the concepts that challenged him. The video lessons were still beneficial for those lessons because it gave my husband a quick review of concepts he hadn’t seen since middle school.
I think this program is great for student that wants to work independently and has a fairly good grasp of basic math concepts. A student that doesn’t need lots of extra practice and instruction can do very well with this program. It is also beneficial for parents who need a quick review. If you have a student that really struggles with math, enjoys long(er) lessons, or needs lots of detailed explanations, this might not be the best fit.
Be sure to check out No-Nonsense Algebra over at the Math Essentials website to get more information. Don’t forget to click on the graphic below to check out the reviews from other Review Crew members who reviewed this program and some of the other math products from Math Essentials.
Disclaimer: I received a FREE copy of this product through the HOMESCHOOL REVIEW CREW in exchange for my honest review. I was not required to write a positive review nor was I compensated in any other way.
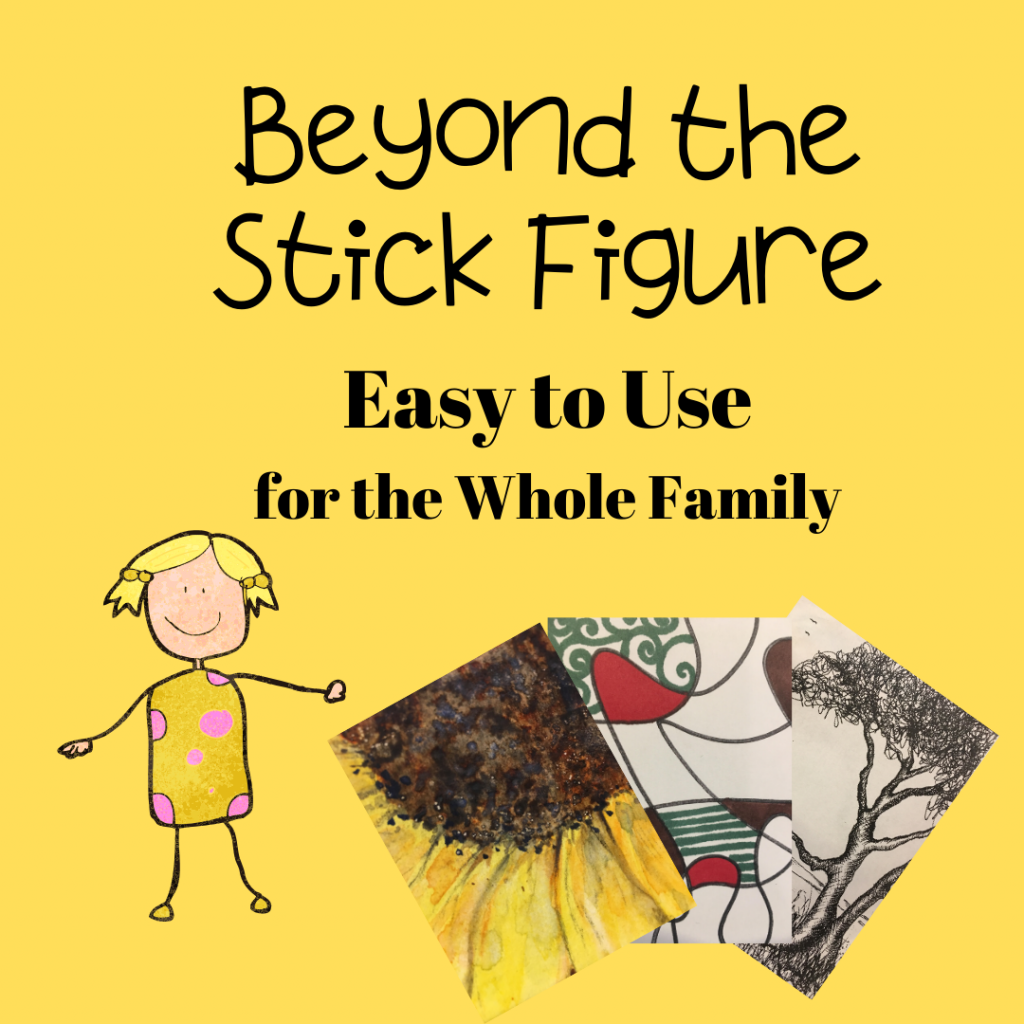
When the opportunity to review Beyond the Stick Figure Complete Drawing Course PLUS 3 Bonus Courses by Beyond the Stick Figure Art School came available, I decided to show my daughter to see if she was interested. We watched the sample video and she was very excited to give it a try.
This program included a three-part drawing course, a pen and ink course, acrylic course, watercolor course, and a 3D design course. Over the last month or so my daughter worked through the first level of the drawing course. This consisted of 15 short video lessons (about five minutes each). While it is designed to be done one lesson a day, we decided it fit best into our schedule to do art 2-3 days per week and do several lessons each day.
The program starts with the very basics of understanding lines, dots, and circles. One thing that seemed insignificant but proved to be really helpful, was that the instructor had the students cut their papers into small sheets. This made the assignments less overwhelming because you had a smaller space to fill. To complete these lessons, we needed a nice set of markers that had both narrow and wider tips and paper.
When I asked my daughter what she thought, she shared, ” All in all, I like the program. She went through each video quickly and it was easy to understand. However, it did take a lot of videos to get to where it felt like we were really drawing.” She felt like it would be a good program for people that are interested in learning to draw but do not have much of a drawing background and recommended it for ages 8 and up. She also mentioned that she was disappointed that she never got to draw something like what was in the sample video, however, she plans to continue the lessons over the summer to see what else she can learn.
We took some time to look through the rest of the drawing program and take a look at the pen and ink course. She is excited to give that course a try and likes the fact that it takes fewer days to have what she felt like was more of a ‘finished product’ than the geometric designs she did in the drawing course.
As a parent, I loved that the lessons were done via video (art is not my strong suit) and they were short and simple. The fact that it started with the very basics and went step by step meant that we didn’t feel left behind or like it was too complicated. However, I do think it might be a bit too simple and broken down for some students. I am excited to try more of her other courses including the 3D design; however, I dislike that I have to mark each of the lessons in the other courses complete before I can move to that course. Once you have marked them complete you can still go back and view them but you cannot move onto the next lesson or course until each one has been marked complete.
If you are looking for a step by step drawing program that is very easy to implement and does not require a lot of parent involvement you might enjoy this program. If your child does well learning one step at a time in small chunks this might be a good fit, however, if you have a child that will be frustrated to not jump right into a big art project this might not be the program for you.
Be sure to check out Beyond the Stick Figure Art School to get more information about Beyond the Stick Figure Complete Drawing Course PLUS 3 Bonus Courses. Don’t forget to click on the graphic below to check out the reviews from other Review Crew members who reviewed this program and see what their artists created. Some of those reviewers also focused on other parts of this course.
Disclaimer: I received a FREE copy of this product through the HOMESCHOOL REVIEW CREW in exchange for my honest review. I was not required to write a positive review nor was I compensated in any other way.
Most of the time when you see a review here on the blog it is for homeschool curriculum or books, but I have a real treat for you today. I had the privilege of trying my hand at fermenting using the Starter Kit from Fermentools. This great little company is run by another homeschool family and offered wonderful customer support and service.
Through no fault of the company, the timing for getting the Starter Kit was not ideal. It arrived shortly after our state was put on social distancing restrictions and when grocery stores were still a little short on fresh produce. This limited my options for our first trial, but thankfully my son had some cabbage in the garden ready to be picked. The kit included an air lock system, a stainless steel lid, pink salt, a glass weight, 2 rubber stoppers, and instructions for using the kit as well as making sauerkraut (other recipes are located on their website).
In my excitement to get started, I used the wrong attachment in my food processor. That head of cabbage turned into finely chopped pieces instead of nice pretty strips. I was concerned that this would not work correctly, but since it was all I had, and I wouldn’t be getting groceries again for another week, I decided to give it a try. Following the directions that came with the kit, I put my shredded cabbage into a bowl. Then I added the salt that came with the kit and mashed it until it was soft and I had gotten some of the liquid out of the leaves.
Next, I put the cabbage into a jar and because I did not have enough liquid, I added a brine to finish covering the cabbage. The next step should have been to place a glass weight on top of the cabbage to keep it under the brine. However, because I had shredded the cabbage so finely it actually sank down into it. Then I set up the air-lock and put the jar into the cabinet (to keep it out of the sun), to wait and see what happened. I had to keep a watch on it through the week to make sure it stayed submerged because of the weight not working properly but at the end of the time, I had some salty but tasty kraut! Perfect for serving alongside grilled bratwurst and some of my husband’s German potato salad.
I let the first batch ferment about two weeks, and by the time that batch was done I was able to purchase more cabbage at the store. This time I remembered to use the right attachment and the weight set perfectly atop my cabbage and kept it below the brine. Also, because I had shredded it correctly it made enough of its own brine and I did not have to add any more.
Now that fresh vegetables are becoming more plentiful at local farms and in the grocery store, I am looking forward to trying other fermented vegetables and fruits. It is strawberry season here and they even have a recipe for fermented strawberry preserves. I think this will be a fun way to add in new recipes and store some of our garden produce, in addition to the health benefits of fermented foods.
Be sure to check out the Starter Kit from Fermentools to get more information or to purchase your own kit. Don’t forget to click on the graphic below to check out the reviews from other Review Crew members who reviewed this kit and see how they used it with their families and what recipes they tried!
We enjoy gardening and growing some of our own food, but sometimes life gets really busy and we just can’t keep up with it all. However, this time at home has come at the perfect time to really kick up our gardening plans. The weather is great, we have time to weed and water, and the kids are really excited to be growing vegetables. I want to share some of the benefits of gardening in our homeschool as well as some tips for getting started.
*Some of the links in my posts may be affiliate links see below for more information. *
Benefits
Getting outside in the garden is a great way to get moving, get in some physical activity, and just enjoy time outside. There is plenty of research showing the benefits of getting outside for both children and adults and this is a great way to enjoy that time together.
Some children can be picky about what they want to eat and may not enjoy trying new foods. Gardening is a great way to help them overcome that challenge. Often children are more willing to try a new vegetable or fruit that they helped grow. It is also a great opportunity to talk about nutrition and vitamins as you plant a variety of different foods.
Finally, the rewards are in the tasty food that you can put on your plate and hopefully the lower grocery bills. A tomato fresh off the vine is far better than any tomato you can ever find in the store and an ear of corn picked and cooked that day, or even better eaten raw, still warm from the July sunshine is a summer delicacy.
Gardening Tips
My first bit of advice is to start small. It can be tempting to go out and plant every vegetable you have ever wanted to eat, but if you start with just a few things it is easier to maintain. Once you get the hang of it, you can increase your garden size.
There are lots of wonderful books and blogs about gardening, but one resource you do not want to forget is your local cooperative extension. Each state has one and in most states, there are county offices that can help you. We love our North Carolina Cooperative Extension for gardening schedules, soil testing, and more.
If you want this to be an enjoyable family experience, I highly recommend getting some input from your children. Let them help pick out which vegetables or flowers they want to plant. If possible, get them their own small garden tools and gloves so that they can really take ownership in the process.
Spend a few minutes each day weeding, watering, and checking on your garden. You can do a lot in a few minutes a day, but if you get behind on the weeding it can take hours to catch up and become overwhelming. In the summer I also recommend, when possible, working in the early morning or evening to avoid the heat of the day.
If you are concerned about physical limitations or are working on strengthening your core, my friend Beth over at Fit2b has created this free resources to help with safe gardening techniques. This can help you get the most out of your gardening while keeping your abdominal muscles safe and supported.
What If I Don’t Have Space?
It does not take a lot of outdoor space to have a garden. You can plant tomatoes or cabbage in a flower bed. We have onions lining our walkway. However, you may not have any outdoor space. You can still enjoy gardening. If you have a porch or balcony, you can do container gardening. If you need to be indoors, you can plant herbs, mushrooms, or even tomatoes in your home. Microgreens are also a great way to quickly grow something indoors. You may not get the outdoor benefits of gardening but it can still be a fun and educational experience.
Whether you love gardening already or are just getting started, I hope these tips have been helpful. I would love for you to share your favorite resources in the comments. Also, if you have any questions feel free to ask those in the comments and I’ll do my best to answer.
Affiliate Disclosure and Resource Library
When you sign up for our free resource library you will get a link and password to the library, we are adding to the library each month with new items. You will also get a bi-weekly newsletter email to keep you up to date on what we have going on.
This post may contain affiliate or referral links, including Amazon affiliate links. As always I will never recommend a product that I don’t believe in and you will never be charged more for purchasing through our links. It does help pay for the costs associated with the blog.
Deals and Freebies
Homeschool Complete is offering a special 10% off discount to my readers! Just use code: SWAG
Evan-Moor is offering their Daily Fundamentals book FREE right now to help out during this time.
Get a FREE Literature Kit from LitWits using Code 11READ4FUN. We are currently enjoying the Heidi kit but have also previously loved the My Side of the Mountain kit.
IEW is offering some great free resources right now.
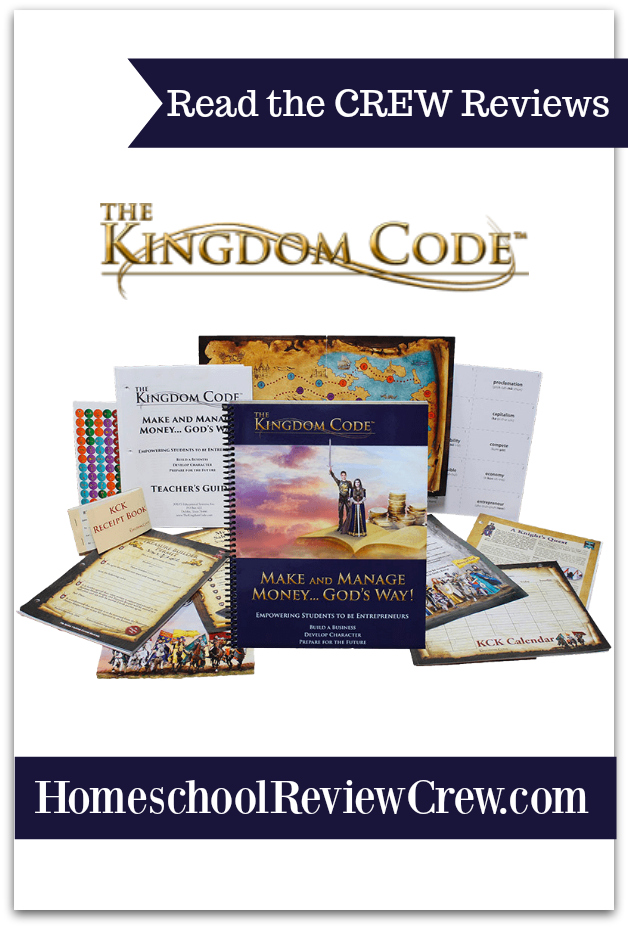
When I was asked about my interest in reviewing the The Complete Starter Kit by The Kingdom Code, I knew that it needed to be my son’s decision. He was very interested in starting and growing his own business but he is on the upper end of the age range that the program was designed for. However, after looking over the samples he was enthusiastically onboard with reviewing this program. According to their website,” The Kingdom Code is a Biblically-based, fun, hands-on program which helps parents and teachers educate kids and young teens about money management and how to become entrepreneurs.” Each student that goes through the program will create and run their very own service based business.
The day it came in the mail he was ready to unbox it and get started. He already had a business idea and couldn’t wait to figure out how to turn his idea into a reality. The kit contained the student textbook, student packet, and teacher’s guide. All I needed to add to have everything ready to go was a couple of three ring binders, tabs, and a few pencil pouches. I was really impressed with all of the resources in the student packet. In addition to worksheets for each lesson, it included a wide variety of forms to help get the business going and keep it organized. There were survey forms, ledger forms, calendars, and even a receipt book. There was also a nice map and stickers to track the student’s progress through the program.
The Kingdom Code is a really cool program. I enjoy using it to start a business. It teaches me about how to sort the money you receive to pay expenses and keep some for you and such. It taught me how to keep a ledger and make sales calls. If you are looking for a good business program I would recommend this program. – Matthew
I sat down with my son that first night and spent about thirty minutes getting everything set up in the binders, looking through the program and getting ready to begin. We then met once or twice a week to go over material from the next lesson and he would work through the other parts independently. If you had a younger child, they might need more hands on guidance at first. The lessons vary in the amount of time/sessions needed to complete them but most include two to four 45 minute sessions per lesson. My son was sometimes able to move a little quicker because of his age and some previous experience with business.
Cutting Grass
Weedeating
Choosing a business to start was easy for us because my son had been cutting grass for a family member and really wanted to turn that skill into a business. He even has long term goals of running his own landscaping business one day.
Each lesson contains a variety of components that introduce Biblical money management concepts, business terminology, practical applications, and actions steps towards owning and operating a business. I noticed two things right away, the inclusion of Bible verses and Biblical principles, and that they went ahead and got started on the business very early on in the curriculum. By lesson two, they were choosing the service based business that they wanted to start. The Biblical foundation was important to us as a family because those are the principals that we try to live by as well as how we strive to operate our own family business. Beginning the business early in the program was a huge win because it allows children to practice what they are learning immediately as well as keeps them from getting bogged down in the terminology and business lessons while waiting to get to the ‘fun stuff’.
Some programs just give a basic overview of a child’s business and then leave them to do the best they can. I really appreciate that this program takes them through step by step including details like keeping money records, writing thank you notes, sales etiquette, making goals, etc. It also teaches them economic principals like capitalism, supply/demand, being financially responsible and managing money.
We are finishing up lesson eight this week and my son already has one consistent customer and several folks that are going to use him on an as needed basis for vacations and such. He has learned to budget his money and has his ledgers and books all set up and is ready to keep growing his business.
We have been very pleased with this program and I look forward to sharing more of our progress and my son’s business as we continue on with this program. Make sure to check out some other reviews at the link below. Today, I have two special opportunities for you from Kingdom Code. First, you can enter to win a prize pack from The Kingdom Code by simply leaving a comment on this post telling me what kind of business your young entrepreneur would like to start or what business you had when you were a child. I will use a random drawing to choose a winner on Monday, June 24th. This pack includes The Kingdom Code Coloring Book and The JR KCK Budget Kit. (This giveaway is open to those living in the United States and APO/FPO addresses only). In addition to the giveaway they are offering my readers 10% off of any products ordered online from The Kingdom Code. Use Code: 10TKC08 to receive your 10% discount.
Kingdom Code Giveaway
Resource Library and Affiliate Disclosure
When you sign up for the Schoolin’ Swag free resource library you will get a link and password to the library, we are adding to the library each month with new items. You will also get a bi-weekly newsletter email to keep you up to date on what we have going on.
This post may contain affiliate or referral links, including Amazon affiliate links. As always I will never recommend a product that I don’t believe in and you will never be charged more for purchasing through our links. It does help pay for the costs associated with the blog.
My sweet, sassy, short-attention-span five-year-old is enthralled with farms and farm animals. I decided that I wanted to spend a couple weeks doing a farm-themed unit study with him for his ‘school’.
He just turned five, so he is not officially in Kindergarten yet, but he loves the idea of ‘doing school’ like his older siblings. I want to encourage his love for learning without burning him out with too much work, so this was a perfect way to get him actively engaged in something that he loves, work on a few skills, and spend some time together.
*Some of the links in my posts may be affiliate links; see below for more information. *
I spent some time each day working with him on different farm activities and then gave him some free time to play and explore using his farm toys and the other farm activities that I put together.
Farm-Themed Preschool Activities
One of his favorites was harvesting letters. I took out our set of magnetic letters, some black beans that we had for a sensory bin, and a couple of toy tractors that he had in his farm set. Then I put the beans and the letters into a large metal pan (you could use any deep dish).
I explained to him that the beans were ‘soil’ and he needed to use his tractors to ‘harvest’ the letters that were planted in the soil. He would scoop up the letters, and then we would talk about what each letter was before putting it into the bucket and scooping up another letter. He thought it was great fun, and it helped him get a little practice with his letters.
Next, we did some shadow matching, puzzle making, and cutting practice as a part of this fun on the farm printable pack from the multitaskinmom.com. We did not do the entire pack but picked a few activities that he would enjoy each day.
Preschool Farm-Themed Art
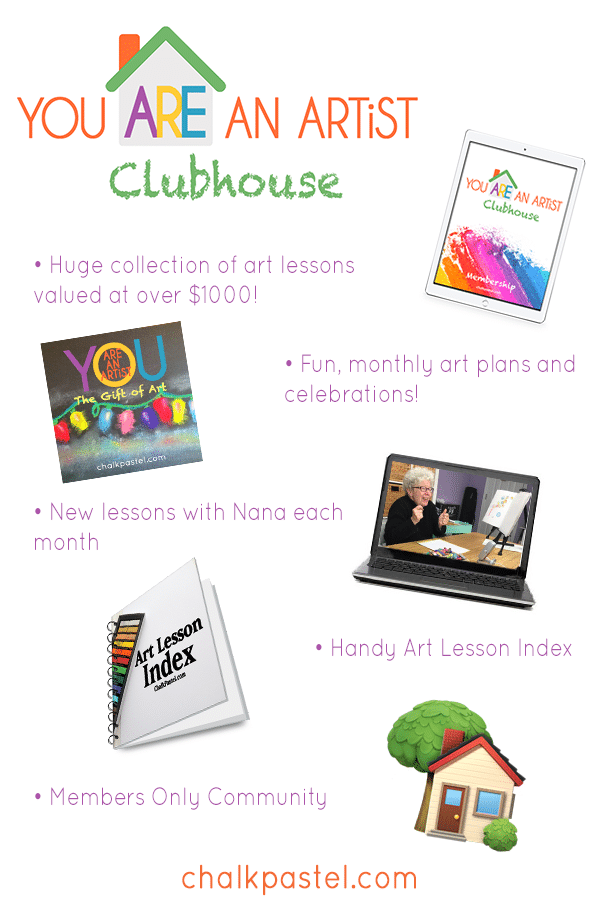
We added in some art by using these fun preschool-level You Are An Artist Barnyard Art Lessons. He did the chick hatching out of the egg the first day and then did all the rest of the lessons the next day because he was enjoying them so much.
I pulled them up on the computer, and he was able to work on the independently while I was helping my older children with some of their schoolwork. (If these art lessons look like fun, check out my other post about farm-themed art lessons. )
Farm-Themed Books for Preschoolers
Throughout the week, we read a variety of farm books. Some of my favorites are the Usborne On the Farm Shine a Light Book and Farm Animals. We also have Baby’s Very First Tractor Book, which I read with both my five-year-old and the baby. Another farm favorite in our house is the Otis series. These fun books about Otis the tractor get requested over and over.
Life on the Farm for Preschoolers
For a more hands-on component of our study, my five-year-old helped his older brother tend our chickens and plant some squash and pepper plants in the garden.
If you do not have room for a full garden, it would be lots of fun to plant a small container garden. You could plant lettuce which grows fast and can be harvested multiple times, or our family favorite, tomatoes. Herbs also tend to do very well in containers.
Independent Play Farm Toys for Preschoolers
For some fun independent play, my son has a Fisher Price Little People Farm set as well as a variety of other farm toys. He can use his imagination to set them up and ‘play farm.’ He loves to build farms and create stories of the events that are going on at the farm.
I am blessed that my older son is gracious enough to often get on the floor and play with him. It is a great bonding experience for them. While we have cleared out a lot of his toys because he was struggling with cleaning up and clutter, the farm set has been a staple for several years.
Farm Field Trip
Finally, I scheduled our unit study around a fun farm field trip. We had some friends invite us on a field trip to an alpaca farm. My son loves llamas, and I knew that since they are so similar, he would really enjoy the alpaca farm.
We were able to see the different alpacas, learn about how they care for and groom them, and see various products made from alpaca wool. My five-year-old really enjoyed it, and my older children are dreaming of starting an Alpaca farm.
As luck would have it, our church also had a farm event going on during our study. One of the generous families from our church invited all of the families with young children out to see their farm. We were able to pet a cow and some sheep, take a hayride, and hang out with the chickens.
This was a great time with friends and perfect for our farm study. If you do not know of a field trip in your area, check with local farms. Many of them will welcome scheduled groups to see their animals or crops. You can also contact your local cooperative extension to see what activities might be available.
We had a great time with our farm unit study, and we hope you get some ideas to help you teach your children about farms. I would love for you to share any other ideas you have in the comments!
Resource Library and Affiliate Disclosure
When you sign up for the Schoolin’ Swag free resource library, you will get a link and password to the library; we are adding to the library each month with new items. You will also get a bi-weekly newsletter email to keep you up to date on what we have going on.
This post may contain affiliate or referral links, including Amazon affiliate links. As always, I will never recommend a product that I don’t believe in and you will never be charged more for purchasing through our links. It does help pay for the costs associated with the blog.
The Tummy Team has some very reasonably priced online rehab programs or esessions. I am excited to be getting a course to help me get back to being in my best health! I have loved the other courses that I have taken from them, and they are so helpful and supportive. I know this one is not directly homeschool related, but it affects so many moms that I wanted to share.
Recently, I realized that our morning routine had gone out the door, and we needed to get it together. I realized that breakfast was a bottleneck for us, but I was not sure how to fix it.
My son has always done better with a high protein breakfast and my husband wants nothing to do with oatmeal. So we typically cooked a full breakfast each morning: eggs, meat and potatoes, egg casserole, pancakes with bacon, etc. For a long time this worked well for us, as my children were all early risers and would help make breakfast each morning.
*Some of the links in my posts may be affiliate links; see below for more information. *
Life Changes and Schedules Change
However, between busy schedules, late nights, and sleeping a bit later in the morning, it just was not working anymore. It was getting to be later and later when we finished cleaning up the kitchen from breakfast and got our school day started. While one of the things I love about homeschooling is the flexibility to set our own schedule, these late mornings were causing us to be rushed to finish up and do things in the afternoons.
I really wanted to be able to go ahead and get our school day started by about 9 am so that we could comfortably be done before our afternoon activities. This also gives us much-needed free time for outdoor play and activities.
I brainstormed breakfast ideas with my family. I asked my readers for ideas for easy and fast protein-packed breakfasts that were low glycemic index and did not involve oatmeal. I added the ideas to my meal plan and gave it all a try.
I have found several ideas that we really love, and we have some other ideas we still need to try out. Daylight Savings Time threw our mornings off a bit last week, but all in all, I am seeing a marked improvement in our ability to eat breakfast, clean up the kitchen and get our day started ‘on time’.
I may add to this list in the coming weeks but I wanted to go ahead and share what has worked well so far. You will notice that some of these are made ahead, some cook fast, some were prepackaged, and others take longer but do not require a lot of hands on time which means we can be working on other things while breakfast cooks.
Frozen Breakfast Burritos
We tried two different versions of frozen breakfast burritos. I found a brand of premade breakfast burritos that were on sale buy one get one free, so I decided to give them a try. The price was very reasonable with the sale (about $1.17 each) but we found that they really didn’t suit the tastes of my family. We also tried making our own frozen breakfast burritos and those were a big hit! We will absolutely be keeping those in the rotation.
To make our own we simply scrambled up a dozen eggs with a bit of milk, a touch of salt, and some cheddar cheese. After cooking the eggs we sliced some additional cheese and placed a slice or two of cheese into each tortilla and then a scoop of eggs. We folded up the tortilla and wrapped it in foil.
You can refrigerate these for a couple of days or freeze them. When you are ready to use them, simply take them out of the freezer, place on a baking sheet and cook in the over at 350 for about 20 minutes or until hot. You can add salsa and sour cream that day if desired. These were very nice because there was very little clean up and only about 2 minutes of hands on time that morning.
Instant Pot Breakfasts
We found this recipe for an Instant Pot sausage, egg, and potatoes breakfast and were excited to try it. The first time we tried, we followed the recipe. We found that our family did not really like the sauce. I adapted the recipe by using water or broth instead of the sauce and found that it was much more to our tastes. We also skip the bell peppers because not everyone in my family likes them. We really enjoyed it with those simple changes.
I timed myself and it took me six minutes of prep work in the morning to get it started. This was cutting the potatoes, onion, and sausage and putting everything into the instant pot. It took about 30 minutes start to finish to get breakfast on the table, but only those first six minutes and then a minute or two to put it onto plates are active time.
I could set it to start and then work on getting the little ones dressed and ready for the day. There was lots of protein and it was delicious. My husband and son added a bit of Cajun seasoning to their potatoes to give them a little added kick.
We also found that we could boil eggs in the Instant Pot to eat that morning or for eating throughout the week. These are an easy way to add protein to any breakfast. They also work well as an easy high-protein snack.
Egg Molds
Scrambling eggs really doesn’t take all that long, but somehow it always seems to make a big mess and take longer than it should to clean up in our house. It also takes very attentive focus so that they do not burn. Egg molds solve this attention problem and clean up easily.
You simply scramble your eggs and mix in whatever add ins you would like to mix into them. This could be veggies like spinach, peppers, squash, or onions. You could also add in small bits of meat like ham. Then ladle it into the molds. You can stack two molds on top of each other and cook them at the same time.
This breakfast idea uses the instant pot for hands-free cooking. Place one cup of water in the bottom of the instant pot, put in the rack and then place the egg mold on top. If you are using two egg molds, be sure to place them off center of each other so that the top one doesn’t sink into the molds of the first one.
Then cook on high pressure for 8 minutes. We often added toast, fruit, or English muffins to round out breakfast on egg mold day. To speed up the process even more you could mix them up the night before, place them in the fridge with the lids on and then in the morning just take the lids off and put them in the instant pot.
Waffles
When I think of waffles, I do not think of a speedy breakfast. If we actually make waffles from scratch in the morning, it can take a very long time and due to the grains and syrup, they tend to be high on the glycemic index. However, my children love them, and I wanted to find workable options.
First, we searched and found a couple of brands of frozen organic whole-grain waffles. Whole grains lower the glycemic index. Then we looked at our toppings to see how we could improve those. Instead of maple syrup we used agave or yogurt and my son adds peanut butter to his for extra protein. These were supper fast and easy but a bit pricier than homemade.
The other option that we found was to make and freeze our own waffles. We can use a whole grain waffle recipe, add in a little protein powder and make yummy healthy waffles. Making waffles can be a messy ordeal but it doesn’t make any more mess to make four batches than one batch so you can make enough for three or four breakfasts all at once.
We tend to do this on a morning that is not rushed but you can also do this one evening and freeze all of them. Then just pop them in the oven for a few minutes when you are ready to enjoy them.
Breakfast Casserole
This idea is one we have been using and perfecting for a while now. It does take quite a bit of time to cook so you do not want to make it fresh on a morning when you are trying to rush out the door. However, it is an easy recipe to double and it does not take very much ‘hands on’ time. You can mix up a large one the first morning or even the night before. We use twelve eggs, a pound of sausage, eight ounces of cheese, two or three shredded potatoes, a bit of milk and salt and pepper to taste.
I also like to add vegetables depending on what we have available, particularly squash or broccoli. Bake until the eggs are cooked through (about 40-45 minutes). Then we eat half of it the first morning and store the other half in the refrigerator until later in the week when we warm it up for a second breakfast.
I hope you find these ideas useful. I am still testing out some options for muffins, breads, and even a healthy ‘pie’ that might be good options to make ahead and have for breakfast. I will share those in another post next month. Please remember that I am not a medical professional. These breakfast ideas work for us but if you have questions about health and nutrition please consult your physician. I would love to hear about your favorite high-protein breakfasts.
Resource Library and Affiliate Disclosure
When you sign up for the Schoolin’ Swag free resource library, you will get a link and password to the library; we are adding to the library each month with new items. You will also get a bi-weekly newsletter email to keep you up to date on what we have going on.
This post may contain affiliate or referral links, including Amazon affiliate links. As always, I will never recommend a product that I don’t believe in, and you will never be charged more for purchasing through our links. It does help pay for the costs associated with the blog.
When people watch my children in the kitchen, one of the most frequent questions I get asked is, “Aren’t you worried about them using a knife?”. While safety is very important and we are always reminding them to use their knives safely, I do not worry because we have spent the time upfront to make sure that they have the knife skills they need to safely do the job. There are a few keys to good knife skills for children that will help them be able to use knives appropriately in the kitchen.
*Some of the links in my posts may be affiliate links see below for more information. *
Choose the Right Knife for the Job
This is one area that is challenging for a lot of parents. How do you choose the right knife for the child and the job? First, we need to understand that ‘dull knives’ are not the solution. This particularly applies to knives that are supposed to be sharp but are not and in cutting things that do not cut easily. If you are trying to cut something with a dull knife you are more likely to slip and cut yourself.
When we start our children with a knife (somewhere around 2 or 3 depending on the child and their interest/development) we start with a butter knife and a lettuce knife. While a butter knife is not a particularly sharp knife, it is not designed to be sharp, and is used to cut things that are soft and easily sliced. This works great for soft fruits and cutting up veggies on their dinner plates. For harder vegetables and fruits that need a sharper knife you can use a lettuce knife. I love these knives because they will cut right through many foods but will not cut your child. As soon as we introduce them to these knives we begin instruction so that they learn to use the knives properly and safely.
As they get older and begin to use regular kitchen and chef’s knives, we make sure they are kept clean and sharpened. You want them to be able to slice what they are cutting and not feel like they have to ‘hack’ at it. It is also beneficial to choose knives that fit well in their hands so that they are able to handle them comfortably. My two older children both received a Sabatier-K chef’s knife for Christmas a couple of years ago that works very well for them. It is a high quality but reasonably priced knife that fits well in their hands. We purchased ours from their outlet store but they are also available on Amazon. At 11 and 12 they can both do any cutting that is required for the meals that they cook.
Quality Instruction
Instruction is vital to good knife skills. While a young child’s fine motor skills may not allow for perfect knife skills in the beginning, you do not want bad habits to develop. For older children or if you need a little refresher yourself, Alton Brown has an episode titled American Slicer that can help with knife skills.
You want to make sure they learn to curl their fingers under and away from the knife, to have a good surface to cut on, to cut or peel away from their bodies, and to be aware of what is around them as they are cutting (make sure baby’s hand isn’t on the cutting board, etc). They need to learn not to run with the knife, to carry it point down like a pair of scissors, and not to swing it around like a toy.
When you begin teaching about knives it is important that young children understand that they may only use the knife with permission and under supervision. As they get older they can be allowed more freedom.
Practice
It is really important that we give them opportunities to practice. It can often seem easier and certainly quicker to just take care of it ourselves. However, giving them multiple opportunities to practice will help grow their skills and confidence. Like many life skills the more they practice the easier it will become, just be sure to continue to monitor for safety until you are confident that they are consistently using the appropriate safety measures.
Teaching children to use knives can feel scary at first but it is a life skill that is so very important. Accidents do happen, but proper training and experience greatly decreases the risk! I highly encourage you to take the time to teach them well and enjoy the shared time in the kitchen. What kitchen skills are you wanting to teach your children?
Resource Library and Affiliate Disclosure
When you sign up for the Schoolin’ Swag free resource library you will get a link and password to the library, we are adding to the library each month with new items. You will also get a bi-weekly newsletter email to keep you up to date on what we have going on.
This post may contain affiliate or referral links, including Amazon affiliate links. As always I will never recommend a product that I don’t believe in and you will never be charged more for purchasing through our links. It does help pay for the costs associated with the blog.
If you are looking to add some new electives or switch up some of your classes, SchoolhouseTeachers.comis having a great sale, that is over 400 courses to use with all of your children for one low price.
Free Makeover Your Morning 5 Day Challenge! This is a great way to help re-focus and get your day off on the right foot.
Every year we plan a couple of big ‘canning days’ and every year about half way through I say I’m never doing it again. Then we finish up and have all the yummy food ready for us all winter and I realize yet again that it was worth the time and energy.
If you are new to canning you should know that you don’t have to go crazy like we do and try to can ‘all the things’. Pick one or two things that you have an abundance of or are readily available at your local farmers market and try a small batch. You can work your way up from there!
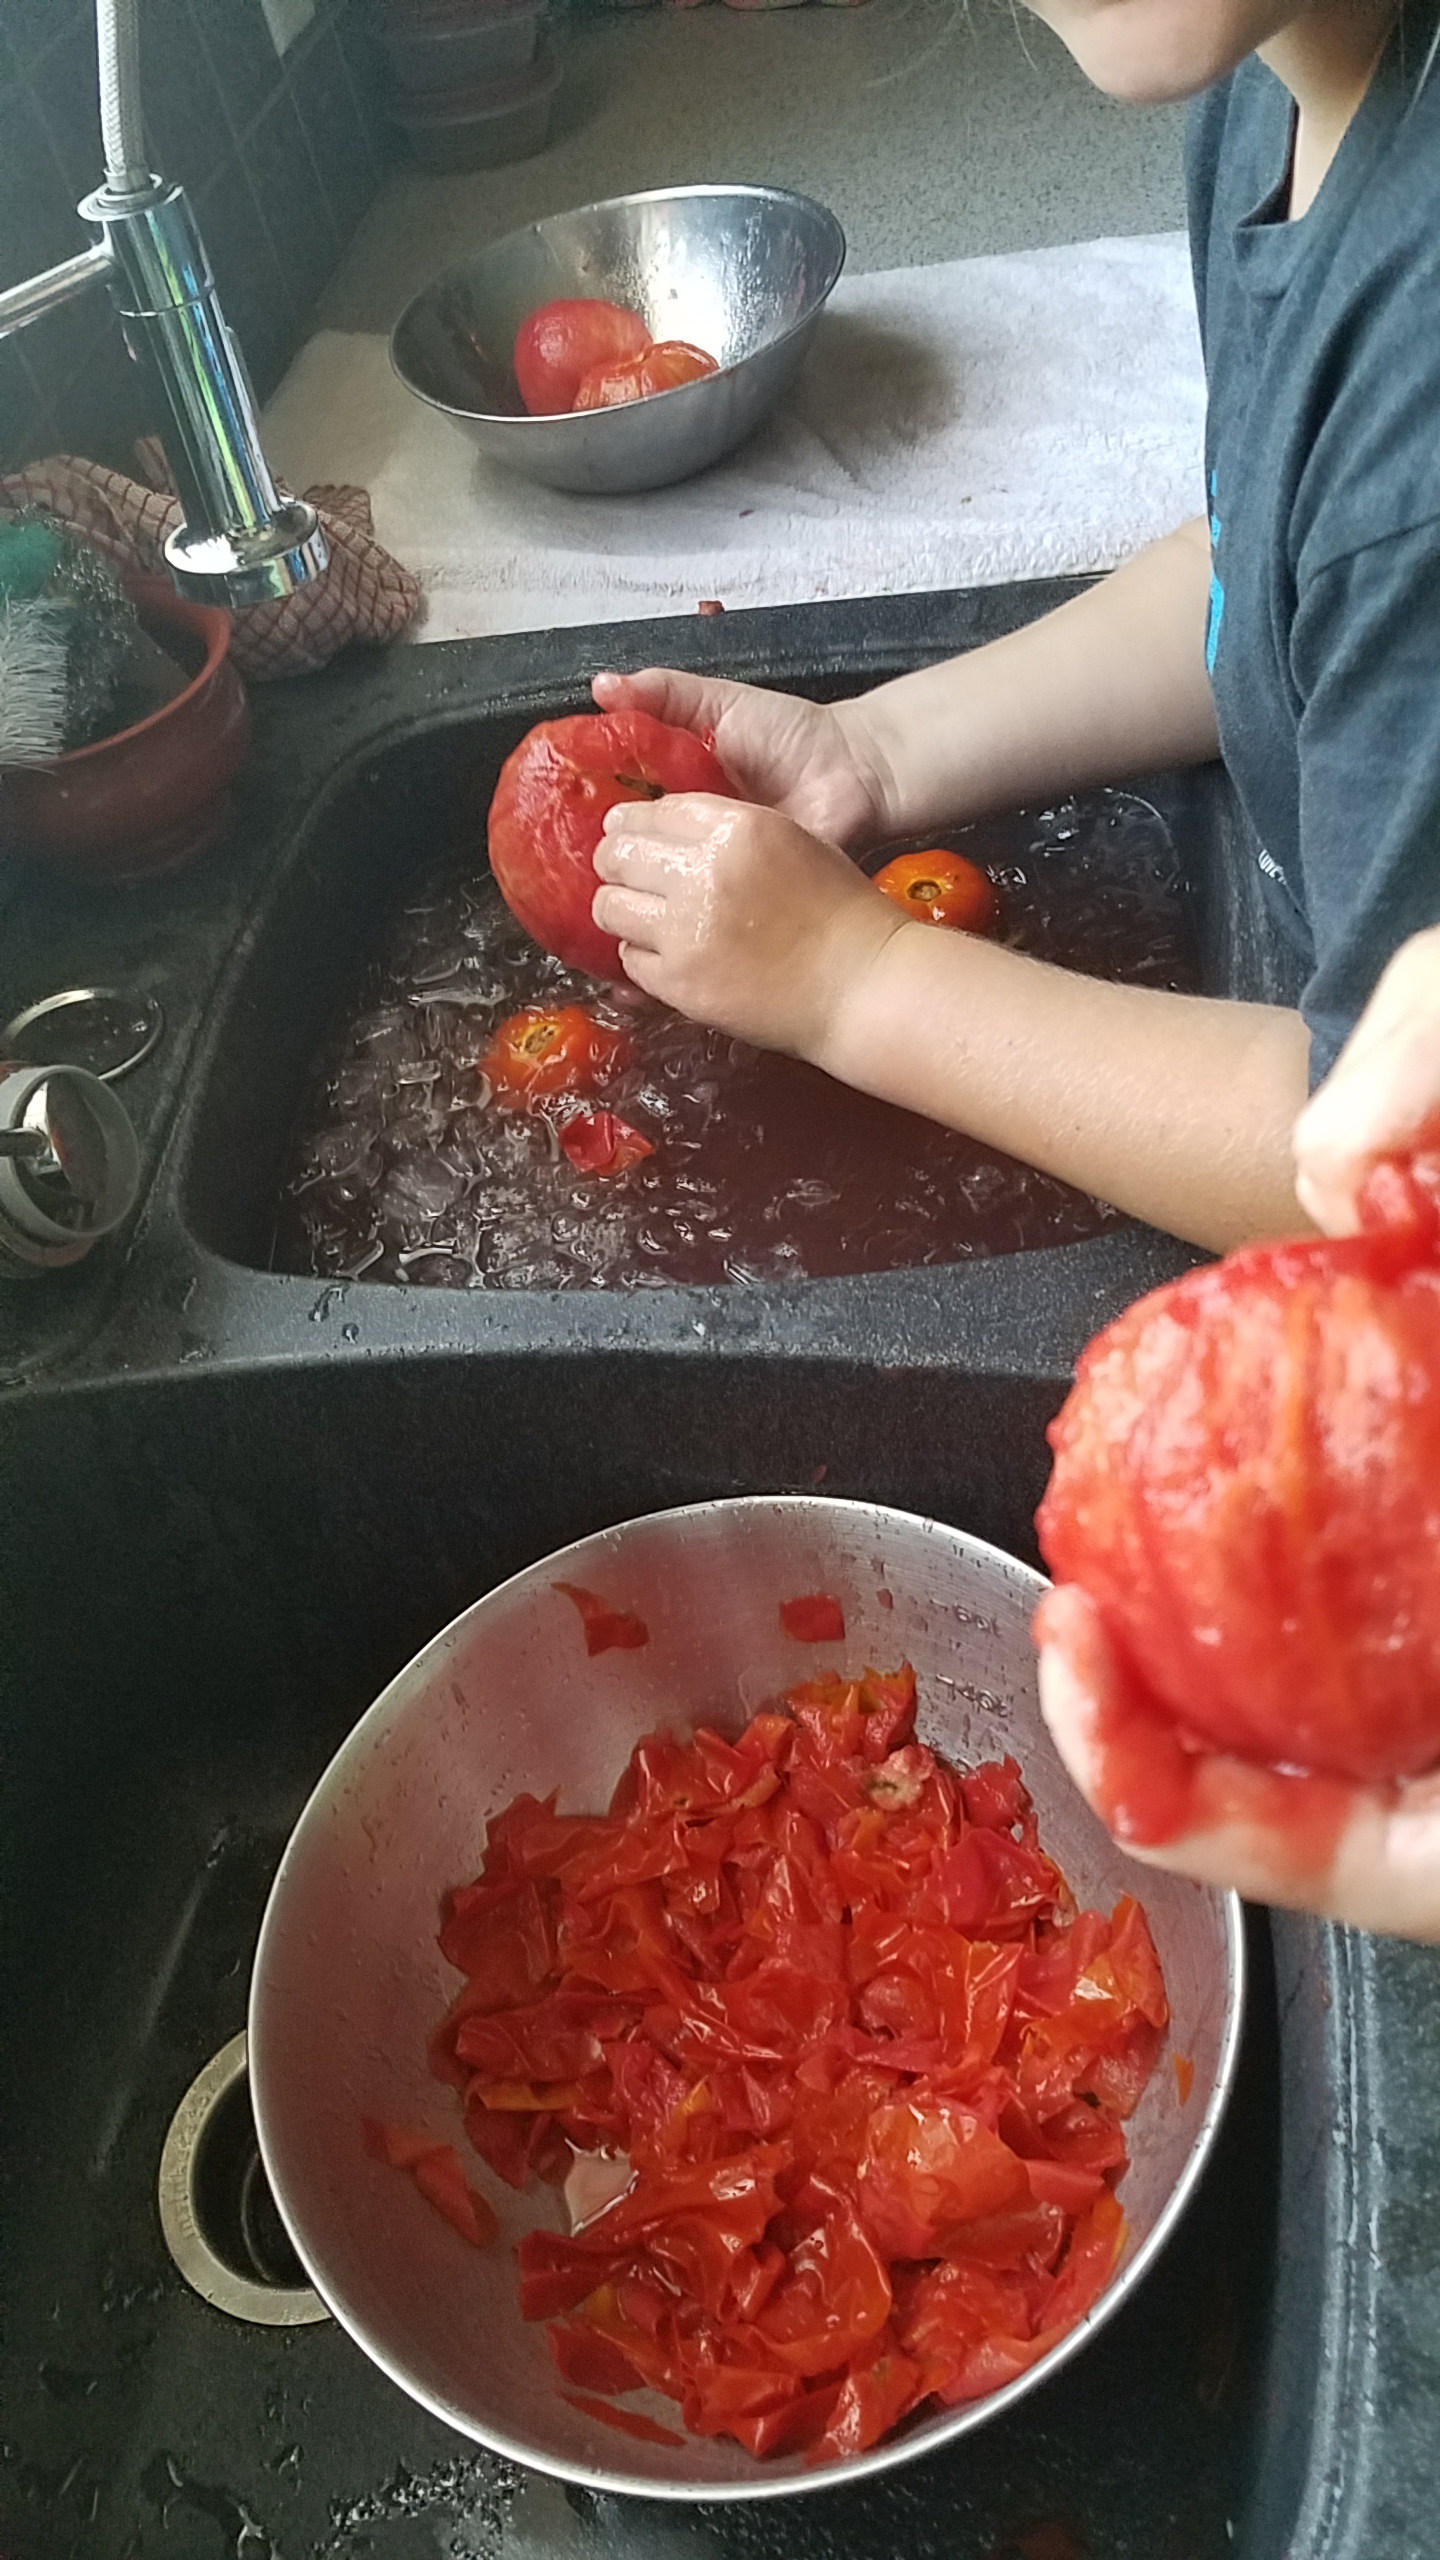
We enjoy using canning as a part of the homesteading and homeschooling process. The children learn about food preservation, fill our pantry for the winter, learn about nutrition, and practice math skills (measuring, weighing, multiplying and dividing recipes). It’s also a great way to give responsibility to older learners. While there are parts of canning that need to be handled by a responsible adult or an older child, there are many parts of the process that are suitable for young children. My little ones tend to especially enjoy peeling tomatoes or peaches and shucking corn! I will answer some of the most common questions I hear about canning below to help you get started!
This slideshow requires JavaScript.
What do you can?
We can a wide variety of things from tomatoes to peaches, salsa to turkey broth. We also enjoy pie fillings and jams for sweet treats in the winter months. We even can strawberry lemonade concentrate which is like a little burst of sunshine during cold winter. Just about any produce can be safely canned, some might need a little sugar or acid, but there’s loads of recipes here.
Is it better to use a water bath canner or a pressure canner?
That depends on what you want to can. I recommend starting with a water bath canner BUT some things are not safe to can in a water bath canner. In general, most fruits and pickles are water bathed and meats and vegetables are pressure canned but you can find out for each specific item on the websites in the resources below.
How do I learn how to can?
I recommend doing some research before you get started canning. If you like books the Ball Canning Guide is an authoritative resource as is the National Center for Food Preservation (USDA). Many people learn better by watching or participating in a hands on class. Check with your local cooperative extension as they often offer free or inexpensive classes on canning. Also, many people that enjoy canning are happy to teach their friends and neighbors. If you have a friend or neighbor teach you, please make sure that you choose someone who is following the recommended safety procedures; there’s lots of ‘old timey’ techniques that aren’t necessarily safe
Canning tools (jar lifter, magnet, canning funnel) These sometimes come with water bath canners like the set above and are also sold separately.
Jars and lids: Jars are reusable and typically cheaper locally than online due to shipping. Always make sure you use canning jars as other jars may not be rated for the heat. Metal lids are one time use, but the rings can be used multiple times. There is a little more of a learning curve but once you are comfortable with the canning process you can use Tattler Lids which are reusable, but cost a bit more.
Recipes: Unlike much of cooking you it is not safe to freelance on your canning recipes. Canning recipes are specifically designed and tested for safety. There are many resources out there with recipes but not all of them have been tested for safety. Two of the most used and recommended resources that are tested and trusted are the USDA and Ball. If you intend to enter canned goods into a fair, many require recipes to be from one of these two sources.
What are your favorite things to can?
As my friend Crystal would say, “Can all the things.” Really though we enjoy canning a variety of different items. Pickles are one of my favorite even though they are little time consuming the rewards are great. We also really like corn salsa (we canned over 50 jars of corn salsa this week). For starting out I recommend jams or fruits as they tend to be simple but delicious and easy to do in small batches.
Why do you can?
We can for several reasons. We love to know where our food came from and support local farmers, we like controlling the ingredients, and enjoy the team building aspects of family canning. We also love to see the children engaged and contributing to the household.
Do you have to grow a huge garden in order to can?
Absolutely not! While growing a large garden is a great way to get produce to can, we often purchase produce in bulk from local farmers in order to can enough for our family’s needs. You can find local farm stands, u-pick farms, or even barter with a neighbor that might have an abundance.
Is it safe?
A quick Google search can lead you to horror stories of canning gone wrong. There is a very real danger to inappropriate canning. Botulism is nothing to play around with, however, as long as you are following safety-tested recipes and procedures canning is very safe. Follow the correct recipes, canning times, and canning procedures and your food is just as a safe (or maybe safer) than what you are buying in the store.
Key Safety Points:
Follow a tested recipe
Use the appropriate canner (never water bath a low acid food that should be pressure canned)
Make sure you have a good seal
What homeschool skills are taught/reinforced?
In addition to it being a valuable life skill in and of itself, there is a lot of math that we use in canning. Measuring and weighing ingredients, multiplying or dividing when we need to halve or double a recipe, elapsed time when determining what time the canners will be done, we’re even considering getting into pH calculations and specific gravity as their chemistry advances to those skills. It is also a good lesson in nutrition as you talk about needing fruits and vegetables all year and preserving them for the winter when they are not able to be grown locally.
We just finished up over 50 jars of corn salsa and 11 jars of plain tomatoes this week. I’m hoping to get a chance to can more tomatoes this summer and my daughter wants to make some blueberry jam to enter into our state fair. Canning is a lot of work but it is very rewarding work and we enjoy spending the time working together as a family. Leave me a comment with your favorite thing to can or any canning questions that you might have.
Resource Library and Affiliate Disclosure
When you sign up for the Schoolin’ Swag free resource library you will get a link and password to the library, we are adding to the library each month with new items. You will also get a bi-weekly newsletter email to keep you up to date on what we have going on.
This post may contain affiliate or referral links, including Amazon affiliate links. As always I will never recommend a product that I don’t believe in and you will never be charged more for purchasing through our links. It does help pay for the costs associated with the blog.
Amazon Prime Day is coming up next week with LOTS of great sales. If you are not an Amazon Prime member you can get a free 30 day trial to take advantage of the great sales.
FREE: Check out this great new FREE resource for classical and Charlotte Mason education! Classical Christian Education & Charlotte Mason. Great for folks already homeschooling or if you have friends that are looking into it!
FREE Poetry Pack from Write Shop! 20 Printable Activities and Worksheets, including: Practice exercises, brainstorming worksheets, poem planning worksheets, word banks, and colorful lined writing pages